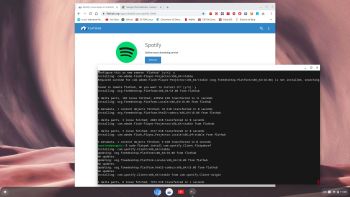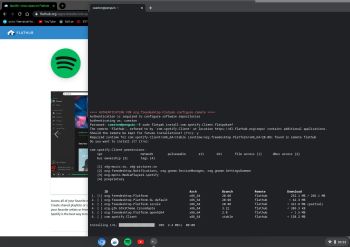
ChromX (Chromium OS), Exton Build 201011, with Netflix, Spotify, Gimp, Steam and a lot of other apps working fast and responsive (after you have installed Flatpak – “An app store and build service for Linux”)

IMPORTANT NOTE 210816
I’m sorry to say that my Chromium builds can’t be used anymore. You can only login as guest, which isn’t very usable. That’s because Google has changed the rules. API keys have to be included in all Chromium builds. Such keys are almost impossible to create and/or include. I will give it a try though. I can only guess, but it seems to me that Google don’t want to allow alternatives to their Chromebooks.
So don’t download/buy Build 190824/201011.

Have I got news for you! Netflix works in ChromX Build 201011 after installing Firefox ESR!
Do it like this:
1. Enable Linux BETA as this screenshot shows – see below under How to use Flatpak
2. Run the command sudo apt install firefox-esr in the terminal window you will get after installing Linux BETA (Debian Buster) – screenshot. Version 78.3.0 of Firefox ESR will be installed. (That is the case 201011). You’ll find Firefox among the Linux appsscreenshot.
3. Open Firefox ESR and go to Firefox Preferences and enable DRM Content as this screenshot shows.
4. Go to https://www.netflix.com and log in. You’ll have to have a paid account of course. Everything will work as this screenshot shows. Very good video and sound quality btw. You’ll find Firefox among the Linux appsscreenshot.
NOTE: The “screenshots” above are pictures taken with my mobile phone. You can’t use Prt Sc when running an application installed with Flatpak or with a terminal command.

About ChromX Build 201011
Enable Linux (BETA) as this screenshot shows. A terminal window will open if the installation is successful. The installation can take up to 10 minutes. After that you can install Steam from Flathub.org. Watch a “screenshot” when I’m running Steam in ChromX today. See below about how to use Flatpak. Screenshot when I’m installing Steam. NOTE: You may have to install Steam the “normal” Debian way. I.e. sudo apt install steam. Your file /etc/apt/sources.list have to look like this then. Please read below under How to install Steam. You can also install Spotify among many other apps. Please read below under How to use Flatpak.

So now you can use ChromX (Chromium OS) in the same way as a Chromebook.

About ChromX and my sources

I have compiled Chromium OS from source for the fifth time. Chromium OS is an open-source project that aims to build an operating system that provides a fast, simple, and more secure computing experience for people who spend most of their time on the web. My Chromium OS Build 201011 is for all 64 bit “normal” Desktop computers and laptops. If you have unusual hardware you could check out ArnoldTheBat’s special Chromium OS builds. Following Chromium OS Docs you can build your own “ChromX”.

More about ChromX
This version (201011) doesn’t replace version 190824. Version 190824 of ChromX can still be downloaded (for free). In both versions you can use Flatpak to install Spotify and many other nice/necessary apps. Read below about how to use Flatpak.

How do I run Chromium OS/ChromX?
Normally you run Chromium OS from a USB stick or SD card, but the system can also be installed to hard drive. Could be useful if you want to bring new life to an old computer. Be aware of the fact that Chromium OS can’t be installed together with other Linux systems (or any other OS). It will “take” the whole disk.

The difference between Chromium OS and Google Chrome OS
Chromium OS is the open source project, used primarily by developers, with code that is available for anyone to checkout, modify, and build.
Google Chrome OS is the Google product that OEMs ship on Chromebooks for general consumer use.

Used kernel
5.4.67

Install my Build 201011 to a USB or SD card stick of at least 16 GB
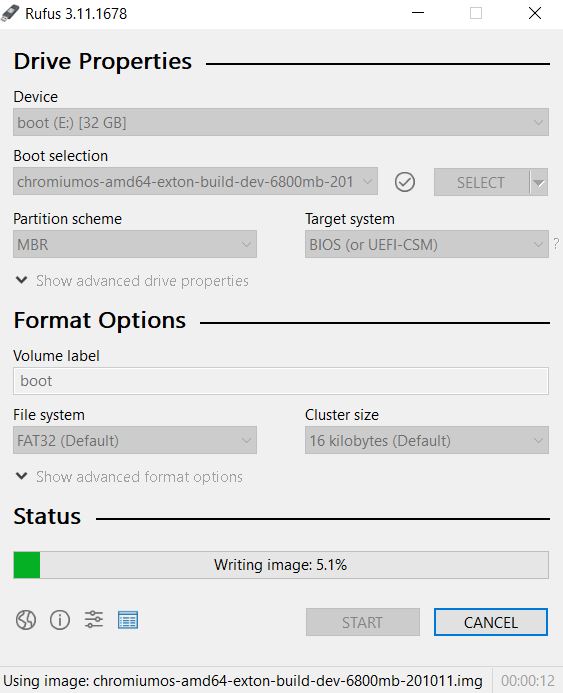
A. In Windows you can use Rufus 3.11. It will look like this. (Unzip chromiumos-amd64-exton-build-dev-802mb-201011.zip first).
About “good” SD cards
Please be aware of that Chromium OS/ChromX is very particular as regards the install media. You’ll have to use the very best SD cards there is on the market. Example: At first I used a Samsung EVO SD card of 64GB. Using that card it was impossible to install Linux BETA no matter how many times I tried. Then I installed ChromX to a Samsung Pro SD card of 32GB. That card worked perfectly well. Everything ran smoothly.

USB/SD installations in Linux
In Linux you shall open up a terminal and run this command: sudo dd if=chromiumos-amd64-exton-build-dev-6800mb-201011.img of=/dev/sdX bs=4M
(You shall of course replace /dev/sdX with for example /dev/sdb or /dev/sdc. Check it carefully before you run the above command in order to avoid data losses).

IMPORTANT Notes about USB sticks
You must use the best (fastest) USB stick/SD card you can get. Using a bad (old) stick won’t work. It appears that not all USB sticks are suitable for topical purposes. I.e. they can not be made bootable or they isn’t fast enough for Chromium OS to run smoothly. I myself have experience of brands Kingston DataTraveler, SanDisk Ultra USB 3.0, SanDisk Extreme USB 3.0 and Sony Micro Vault. The first three works (for me). You shall not use USB sticks of older model. They may work, but mostly bad. If you – after the installation of Chromium OS to the USB stick – get different error messages when you try to run the system from the stick it is often because the stick is not “good enough”. It can also happen that you can’t enable Linux BETA if your stick is “bad”/slow. This means that you can’t install Spotify and other nice apps with Flatpak. I recommend that you use SanDisk Extreme USB 3.0 or (even better) Corsair Flash Voyager GT USB 3.0.

Install to hard drive
If you want to install the system to your hard drive, follow the instructions here and here. Beware of the warnings noted in the links! When prompted for a password for the chronos user, use “exton” (without the quotes!).

Persistence
All your system changes will (of course) be automatically saved directly on the USB stick (or SD card).

Updates/upgrades
You do not have to take any action in order to keep your system up to date. Chromium OS will itself check for updates each time it is launched and automatically install them.

How to use Flatpak
Follow this instruction:
1a. Increase the system partition first – see below about how to do that.
1. Go to chrome://settings in Chromium
2. Enable Linux (BETA) as this screenshot shows. A terminal window will open if the installation is successful. The installation can take up to 10 minutes. If you get errors your USB stick or SD card may not be good enough. Reboot and try again. You may have to remove Linux and reinstall. If nothing helps you should try with a new better USB stick or SD card.
3. Install Flatpak with the command sudo apt install flatpak as this screenshot shows.
4. When Flatpak is installed you can install many useful apps such as Spotify and Gimp. Go to Flathub using Chromium. Search for Adobe Flash, Spotify and Gimp. Copy respective Download link (Install) and get each install script with Wget. Example command: wget https://flathub.org/repo/appstream/com.spotify.Client.flatpakref – see this screenshot.
5. Install Spotify with the command sudo flatpak install com.spotify.Client.flatpakref. You’ll find Spotify among the Linux appsscreenshot. Possibly you should first install Adobe Flash with the command sudo flatpak install com.adobe.Flash-Player-projector.flatpakref – see this screenshot
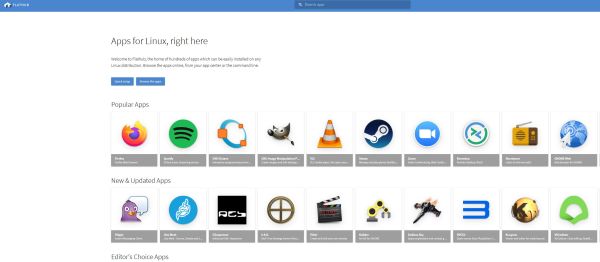
6. Then just go on and install all other apps you want from Flathub. This it how it looks there – screenshot. Install the apps you want in the same way as I’ve described above.

Netflix
You cannot run Netflix in the Chromium Browser. But after installing Firefox ESR – see above – Netflix works very well! I.e. run the command sudo apt install firefox-esr (using the terminal window you will get after installing Linux BETA – see about that above under How to use Flatpak). You’ll find Firefox among the Linux appsscreenshot.

Shutdown ChromX
Watch this screenshot.

Wallpapers
You can use any photo you have on your computer as wallpaper – screenshot.

How to install Steam
Install Steam using the commands below.
1. sudo dpkg –add-architecture i386
2. sudo apt update
3. sudo apt install libgl1-mesa-dri:i386 libgl1-mesa-glx:i386 libglapi-mesa:i386
4. sudo ldconfig
5. sudo apt install nano
6. sudo nano /etc/apt/sources.list – add the following to lines
deb https://deb.debian.org/debian buster main contrib non-free

deb https://deb.debian.org/debian-security buster/updates main contrib non-free

Remove the two lines above those lines in /etc/apt/sources.list – screenshot
7. sudo apt update
8. sudo apt install steam
Launch Steam and enjoy! It will download and install updates upon first run.

Increase the size of the system partition

The system is of about 4GB and the system partition of about 3GB. This means that you’ll only have about 1GB for new installations etc. if you don’t do anything. I.e. if you use a card of 32GB about 27GB will be unused. You can however get rid of the 1GB limit after installing ChromX in Linux with the install command or in Windows using Rufus.
– start up Ubuntu or another Linux system – you can also use a Linux Live CD/USB stick
– start GParted – screenshot before resizing
– screenshot after resizing
NOTE: You’ll have to increase the system partition before you can use/enable Linux BETA. Linux (Debian Buster) will take about 7GB.

Why should I use ChromX?
They are many Chromium OS builds out there. Many more mature and ready to go than ChromX. For example CloudReady. ChromX Build 201011/190824 is nevertheless more fun to use in my opinion. Using Flatpak you can tailor the Chromium OS system according to your needs.

ChromX POPULARITY
ChromX Build 190824 have been downloaded about 1000 times each week since it was released, which makes it my most popular dist ever. Only to be compared with ExTiX.

SCREENSHOTS when ChromX is running
1. ChromX first boot screen
2. ChromX Linux BETA sources.list
3. ChromX install Linux BETA (Debian Buster)
4. ChromX installing Steam
5. ChromX installing Spotify using Flatpak

Chromium OS GNU GENERAL PUBLIC LICENSE
GNU General Public License, version 2
Creative Commons Attribution 2.5 license

IMPORTANT NOTE 210816
I’m sorry to say that my Chromium builds can’t be used anymore. You can only login as guest, which isn’t very usable. That’s because Google has changed the rules. API keys have to be included in all Chromium builds. Such keys are almost impossible to create and include. I will give it a try though. I can only guess, but it seems to me that Google don’t want to allow alternatives to their Chromebooks. So don’t download/buy Build 190824/201011.

DOWNLOAD
Download chromiumos-amd64-exton-build-dev-802mb-201011.zip for $ 9 from Payloadz.com…

md5sum

Unpack with 7zip and you will get the file chromiumos-amd64-exton-build-dev-6800mb-201011.img (which you shall install to a USB stick or SD Card).

Read about my Android-x86 Systems – 11, 10, Pie, Oreo, Nougat, Marshmallow, Lollipop and KitKat at
andex.exton.net – latest is AndEX 11 (with GAPPS), AndEX 10 (with GAPPS) and AndEX Pie 9.0 (also with GAPPS)!
and
about my Android 14, 13, 12, 11, 10, Pie, Oreo, Nougat, Marshmallow and Lollipop versions for Raspberry Pi 5, Pi 4 and  Pi 3/2 at
raspex.exton.se
– latest is RaspAnd 14 (with GAPPS), 13 and 12 (without GAPPS), RaspAnd 11 (with GAPPS) and RaspAnd Oreo 8.1
(also with GAPPS)!

ChromX (Chromium OS), Exton Build 190824, with Netflix, Spotify, Gimp and a lot of other apps working fast and responsive (after you have installed Flatpak – “An app store and build service for Linux”)

IMPORTANT NOTE 210816
I’m sorry to say that my Chromium builds can’t be used anymore. You can only login as guest, which isn’t very usable. That’s because Google has changed the rules.API keys have to be included in all Chromium builds. Such keys are almost impossible to create and/or include. I will give it a try though. I can only guess, but it seems to me that Google don’t want to allow alternatives to their Chromebooks. So don’t download ChromX Build 190824.

Have I got news for you! Netflix works in ChromX Build 190824 after installing Firefox ESR!
Do it like this:
1. Enable Linux BETA as this screenshot shows – see below under How to use Flatpak
2. Run the command sudo apt install firefox-esr in the terminal window you will get after installing Linux BETA (Debian Stretch) – screenshot. Version 78.3.0 of Firefox ESR will be installed. (That is the case 201006). You’ll find Firefox among the Linux appsscreenshot.
3. Open Firefox ESR. It will complain about the fact that you’re running an old version of Firefox. Just ignore the message and go to Firefox Preferences and enable DRM Content as this screenshot shows.
4. Go to https://www.netflix.com and log in. You’ll have to have a paid account of course. Everything will work as this screenshot shows. Very good video and sound quality btw. You’ll find Firefox among the Linux appsscreenshot.
NOTE: The “screenshots” above are pictures taken with my mobile phone. You can’t use Prt Sc when running an application installed with Flatpak or with a terminal command.

NOTES October 8, 2020
Since ChromX is quite old by now I have checked that everything described in this article works. And it does! So there is no need for me to upgrade ChromX right now. You can however upgrade Linux BETA (Debian) from Stretch to Buster (Debian 10.6) if you want to. In order to install Steam (from Flathub.org) you’ll have to upgrade Debian. Upgrade this way.
1. Enable Linux BETA as this screenshot shows.
2. sudo apt update
3. sudo apt install nano
4. cd /etc/apt
5. Use Nano and change the content in all files from stretch to buster as this “screenshot” shows. Add [trusted=yes] as the screenshot shows.
6. sudo apt update
7. Upgrade Debian to buster with the command sudo apt dist-upgrade screenshot.
After that you can install Steam from Flathub.org. Watch a “screenshot” when I’m running Steam in ChromX today. See below about how to use Flatpak. Screenshot when I’m installing Steam. NOTE: You may have to install Steam the “normal” Debian way. I.e. sudo apt install steam. Please read below under How to install Steam.
NOTE 201011: Despite what I wrote above I have released a new version of ChromX today. Read about ChromX Build 201011…

So now you can use ChromX (Chromium OS) in the same way as a Chromebook.

About ChromX and my sources

I have compiled Chromium OS from source for the fourth time. Chromium OS is an open-source project that aims to build an operating system that provides a fast, simple, and more secure computing experience for people who spend most of their time on the web. My Chromium OS Build 190824 is for all 64 bit “normal” Desktop computers and laptops. If you have unusual hardware you could check out ArnoldTheBat’s special Chromium OS builds. Following Chromium OS Docs you can build your own “ChromX”.

Most important changes
This version (190824) replaces version 181218. You can now use Flatpak to install Spotify and many other nice/necessary apps. Read below about how to use Flatpak.

How do I run Chromium OS?
Normally you run Chromium OS from a USB stick, but the system can also be installed to hard drive. Could be useful if you want to bring new life to an old computer. Be aware of the fact that Chromium OS can’t be installed together with other Linux systems (or any other OS). It will “take” the whole disk.

The difference between Chromium OS and Google Chrome OS
Chromium OS is the open source project, used primarily by developers, with code that is available for anyone to checkout, modify, and build.
Google Chrome OS is the Google product that OEMs ship on Chromebooks for general consumer use.

Used kernel
4.14

Install my Build 190824 to a USB or SD card stick of at least 16 GB
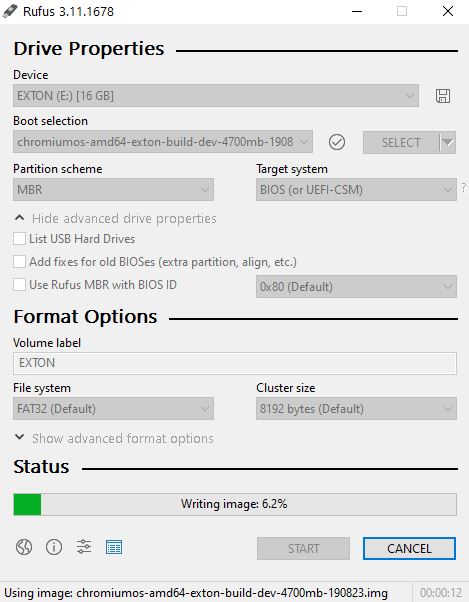
A. In Windows you can use Rufus 3.11. It will look like this. (Unzip chromiumos-amd64-exton-build-dev-727mb-190824.zip first).

About “good” SD cards
Please be aware of that Chromium OS/ChromX is very particular as regards the install media. You’ll have to use the very best SD cards there is on the market. Example: At first I used a Samsung EVO SD card of 64GB. Using that card it was impossible to install Linux BETA no matter how many times I tried. Then I installed ChromX to a Samsung Pro SD card of 32GB. That card worked perfectly well. Everything ran smoothly.

USB installation in Linux
In Linux you shall open up a terminal and run this command: sudo dd if=chromiumos-amd64-exton-build-dev-4700mb-190823.img of=/dev/sdX bs=4M
(You shall of course replace /dev/sdX with for example /dev/sdb or /dev/sdc. Check it carefully before you run the above command in order to avoid data losses).

IMPORTANT Notes about USB sticks
You must use the best (fastest) USB stick/SD card you can get. Using a bad (old) stick won’t work. It appears that not all USB sticks are suitable for topical purposes. I.e. they can not be made bootable or they isn’t fast enough for Chromium OS to run smoothly. I myself have experience of brands Kingston DataTraveler, SanDisk Ultra USB 3.0, SanDisk Extreme USB 3.0 and Sony Micro Vault. The first three works (for me). You shall not use USB sticks of older model. They may work, but mostly bad. If you – after the installation of Chromium OS to the USB stick – get different error messages when you try to run the system from the stick it is often because the stick is not “good enough”. It can also happen that you can’t enable Linux BETA if your stick is “bad”/slow. This means that you can’t install Spotify and other nice apps with Flatpak. I recommend that you use SanDisk Extreme USB 3.0 or (even better) Corsair Flash Voyager GT USB 3.0.

Install to hard drive
If you want to install the system to your hard drive, follow the instructions here and here. Beware of the warnings noted in the links! When prompted for a password for the chronos user, use “exton” (without the quotes!).

USB persistence
All your system changes will (of course) be automatically saved directly on the USB stick (or SD card).

Updates/upgrades
You do not have to take any action in order to keep your system up to date. Chromium OS will itself check for updates each time it is launched and automatically install them.

How to use Flatpak
Follow this instruction:
1a. Increase the system partition first – see below about how to do that.
1. Go to chrome://settings in Chromium
2. Enable Linux (BETA) as this screenshot shows. A terminal window will open if the installation is successful. The installation can take up to 10 minutes. If you get errors your USB stick or SD card may not be good enough. Reboot and try again. You may have to remove Linux and reinstall. If nothing helps you should try with a new better USB stick or SD card.
3. Install Flatpak with the command sudo apt install flatpak as this screenshot shows.
4. When Flatpak is installed you can install many useful apps such as Spotify and Gimp. Go to Flathub using Chromium. Search for Adobe Flash, Spotify and Gimp. Copy respective Download link (Install) and get each install script with Wget. Example command: wget https://flathub.org/repo/appstream/com.spotify.Client.flatpakref – see this screenshot.
5. Install Spotify with the command sudo flatpak install com.spotify.Client.flatpakref. You’ll find Spotify among the Linux appsscreenshot. Possibly you should first install Adobe Flash with the command sudo flatpak install com.adobe.Flash-Player-projector.flatpakref – see this screenshot
6. Then just go on and install all other apps you want from Flathub. This it how it looks there – screenshot. Install the apps you want in the same way as I’ve described above.

Netflix
You cannot run Netflix in the Chromium Browser. But after installing Firefox ESR – see above – Netflix works very well! I.e. run the command sudo apt install firefox-esr (using the terminal window you will get after installing Linux BETA – see about that above under How to use Flatpak). You’ll find Firefox among the Linux appsscreenshot.

Shutdown ChromX
Watch this screenshot.

How to install Steam
Install Steam using the commands below.
1. sudo dpkg –add-architecture i386
2. sudo apt update
3. sudo apt install libgl1-mesa-dri:i386 libgl1-mesa-glx:i386 libglapi-mesa:i386
4. sudo ldconfig
5. sudo apt install nano
6. sudo nano /etc/apt/sources.list – add the following to lines
deb https://deb.debian.org/debian buster main contrib non-free

deb https://deb.debian.org/debian-security buster/updates main contrib non-free

Remove the two lines above those lines in /etc/apt/sources.list
7. sudo apt update
8. sudo apt install steam
Launch Steam and enjoy! It will download and install updates upon first run.

Increase the size of the system partition

The system is of about 4GB and the system partition of about 3GB. This means that you’ll only have about 1GB for new installations etc. if you don’t do anything. I.e. if you use a card of 32GB about 27GB will be unused. You can however get rid of the 1GB limit after installing ChromX in Linux with the install command or in Windows using Rufus.
– start up Ubuntu or another Linux system – you can also use a Linux Live CD/USB stick
– start GParted – screenshot before resizing
– screenshot after resizing
NOTE: You’ll have to increase the system partition before you can use/enable Linux BETA. Linux (Debian) will take about 7GB.

Why should I use ChromX?
They are many Chromium OS builds out there. Many more mature and ready to go than ChromX. For example CloudReady. ChromX Build 190824 is nevertheless more fun to use in my opinion. Using Flatpak you can tailor the Chromium OS system according to your needs.

SCREENSHOTS when ChromX is running
1. Installing Flatpak
2. Installing Linux BETA (a Debian system)
3. Installing Spotify
4. Installing Gimp
5. ChromX Desktop (you can use any picture you have on your computer as wallpaper)
6. Using Steam (with Steam Play, Linux users can play games that are available on Windows only) in ChromX after upgrading Linux BETA (Debian) from Stretch to Busterscreenshot

Chromium OS GNU GENERAL PUBLIC LICENSE
GNU General Public License, version 2
Creative Commons Attribution 2.5 license

DOWNLOAD
sf-download-button

Chromium OS Exton Build 190824 can also be downloaded from The Swedish Linux Society.

Unpack with 7zip and you will get the file chromiumos-amd64-exton-build-dev-4700mb-190823.img (which you shall install to a USB stick).

md5sum

Read about my Android-x86 Systems – 10, Pie, Oreo, Nougat, Marshmallow, Lollipop and KitKat at
andex.exton.net – latest is AndEX 10 (with GAPPS) and AndEX Pie 9.0 (also with GAPPS)!
and

about my Android 11, 10, Pie, Oreo, Nougat, Marshmallow and Lollipop versions for Raspberry Pi 4 and 3/2 at
raspex.exton.se
– latest is RaspAnd 11 (without GAPPS) and RaspAnd Oreo 8.1 (with GAPPS)!